HotBox: Bake Hotspot Trim Sheets in Blender

A New Tool for Hotspot Trim Sheets
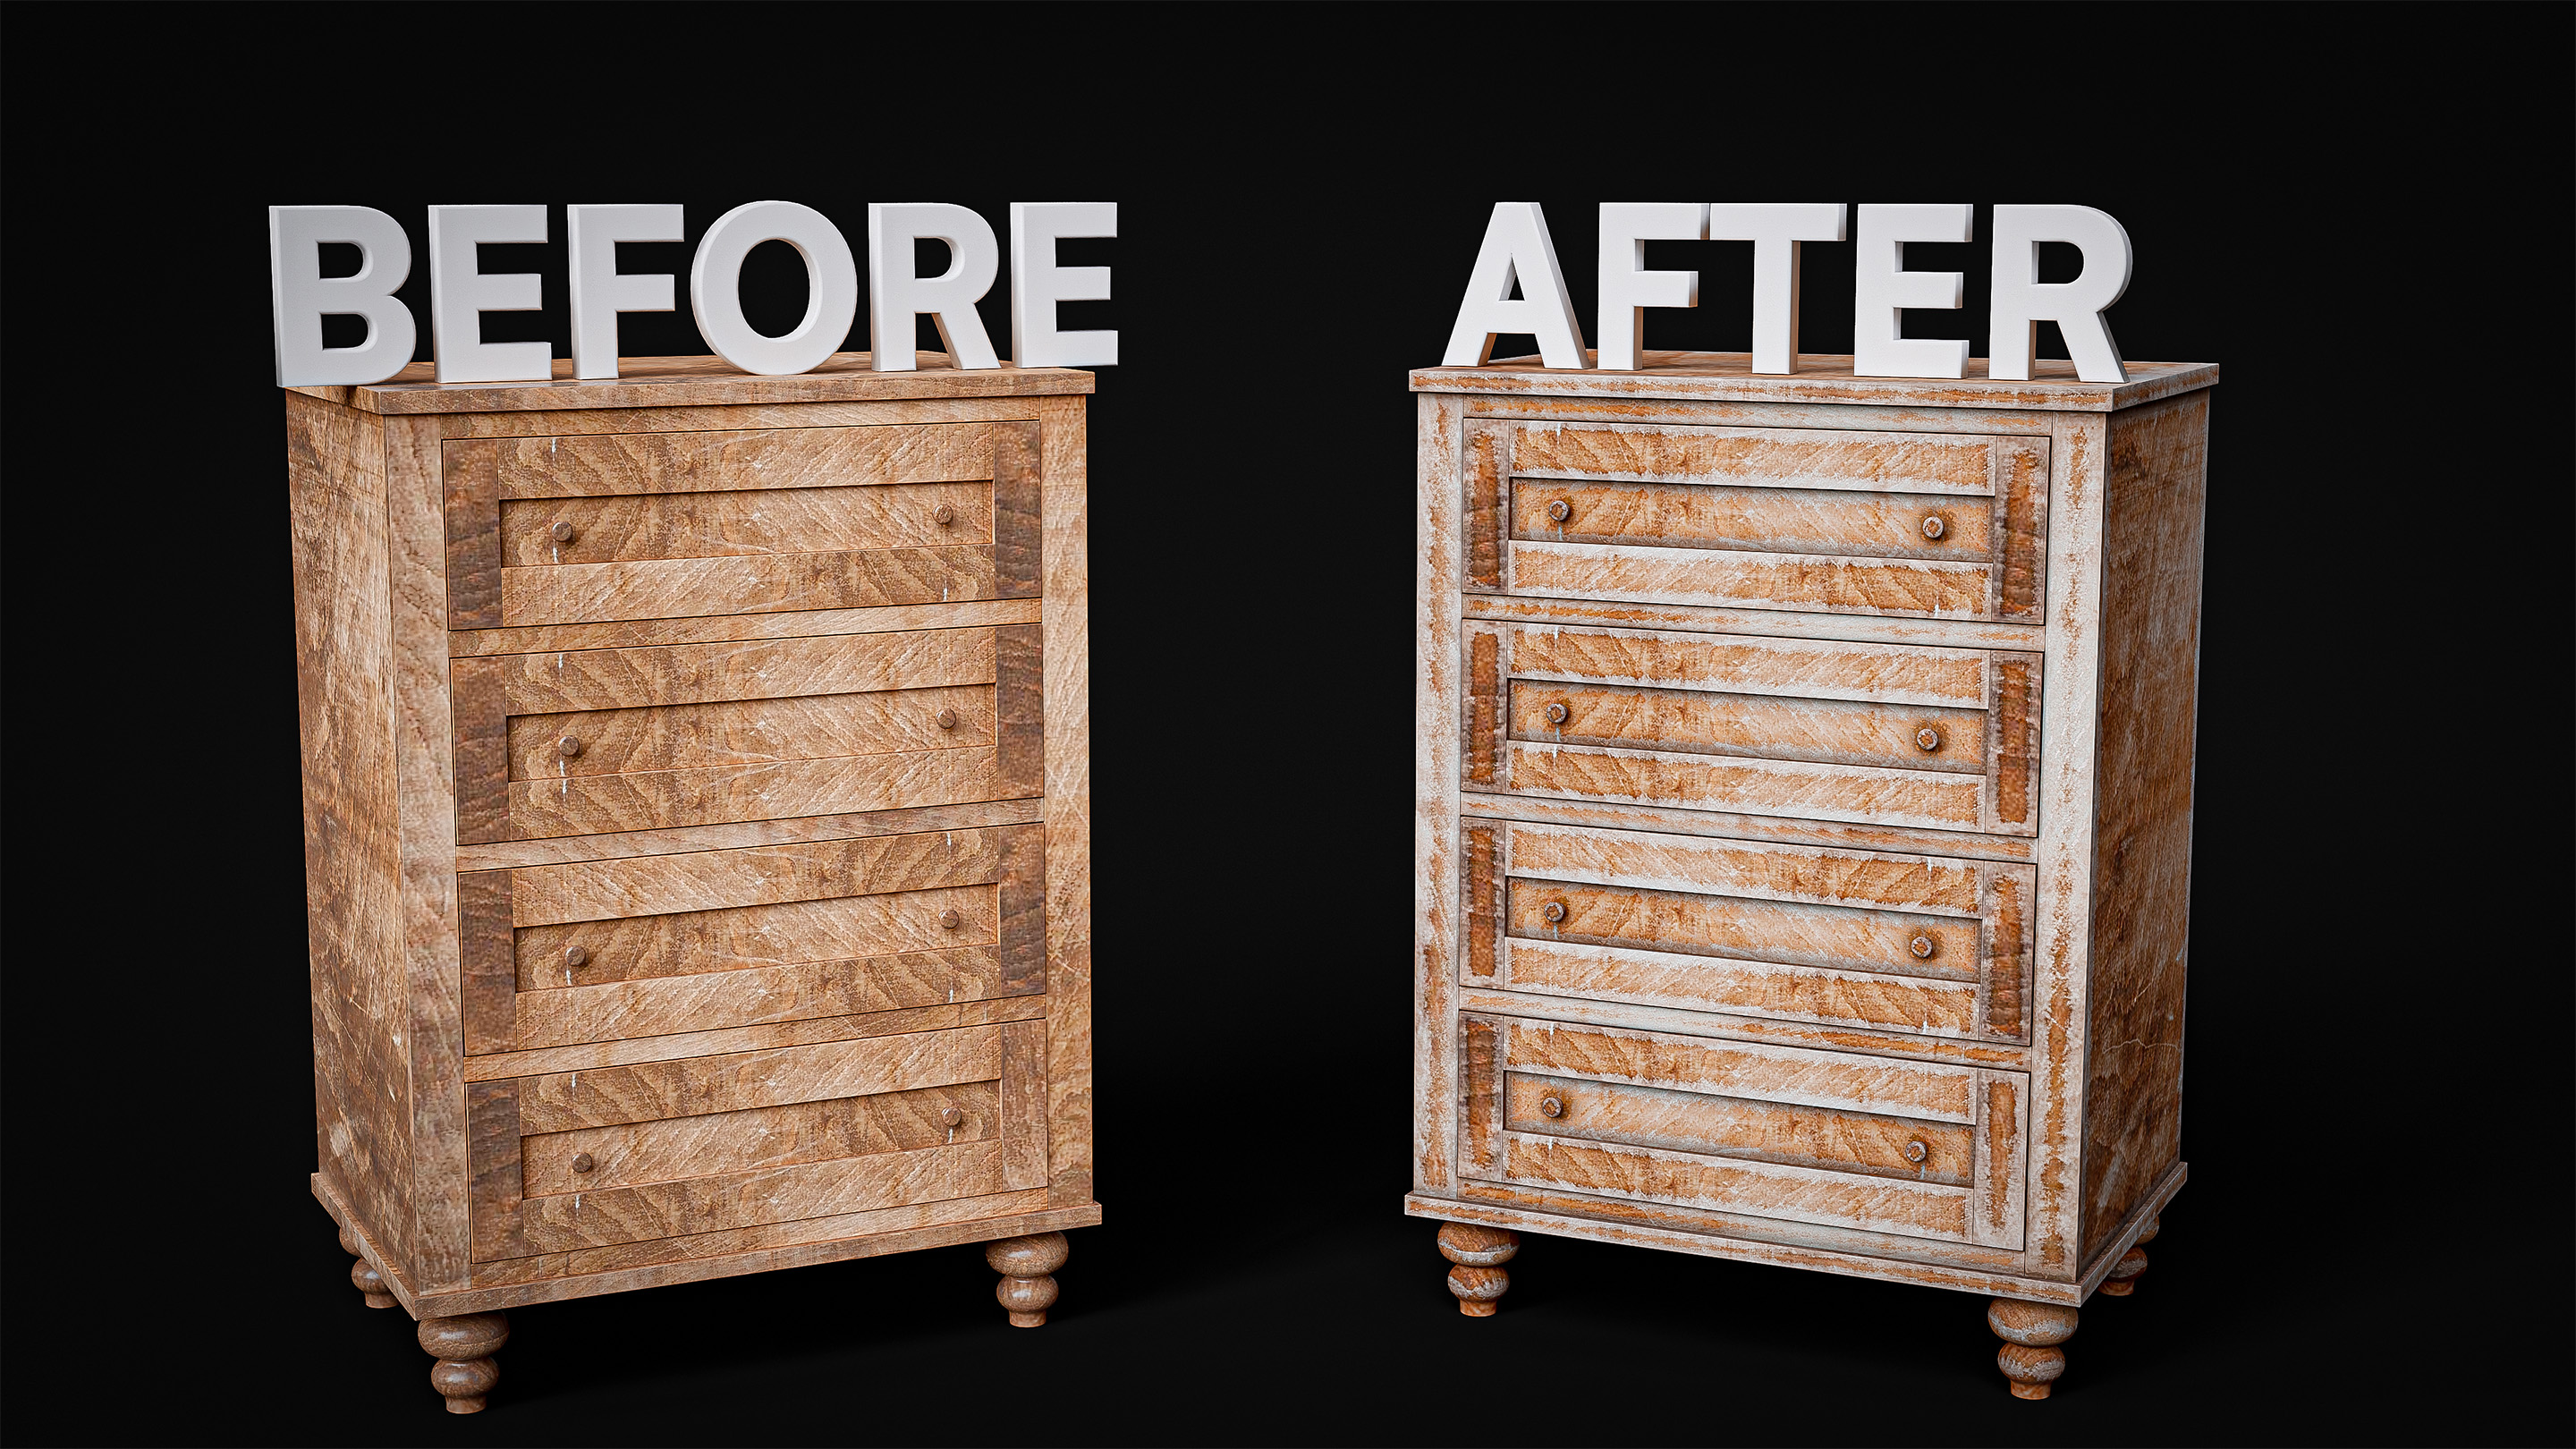
Today I’ll show my tool that lets you bake custom hotspot trim sheets directly in Blender. It’ll take your props from looking like this, to this (see image)

It’s a single .blend file with a single node group. You can download it over on my Patreon. Link in the description.
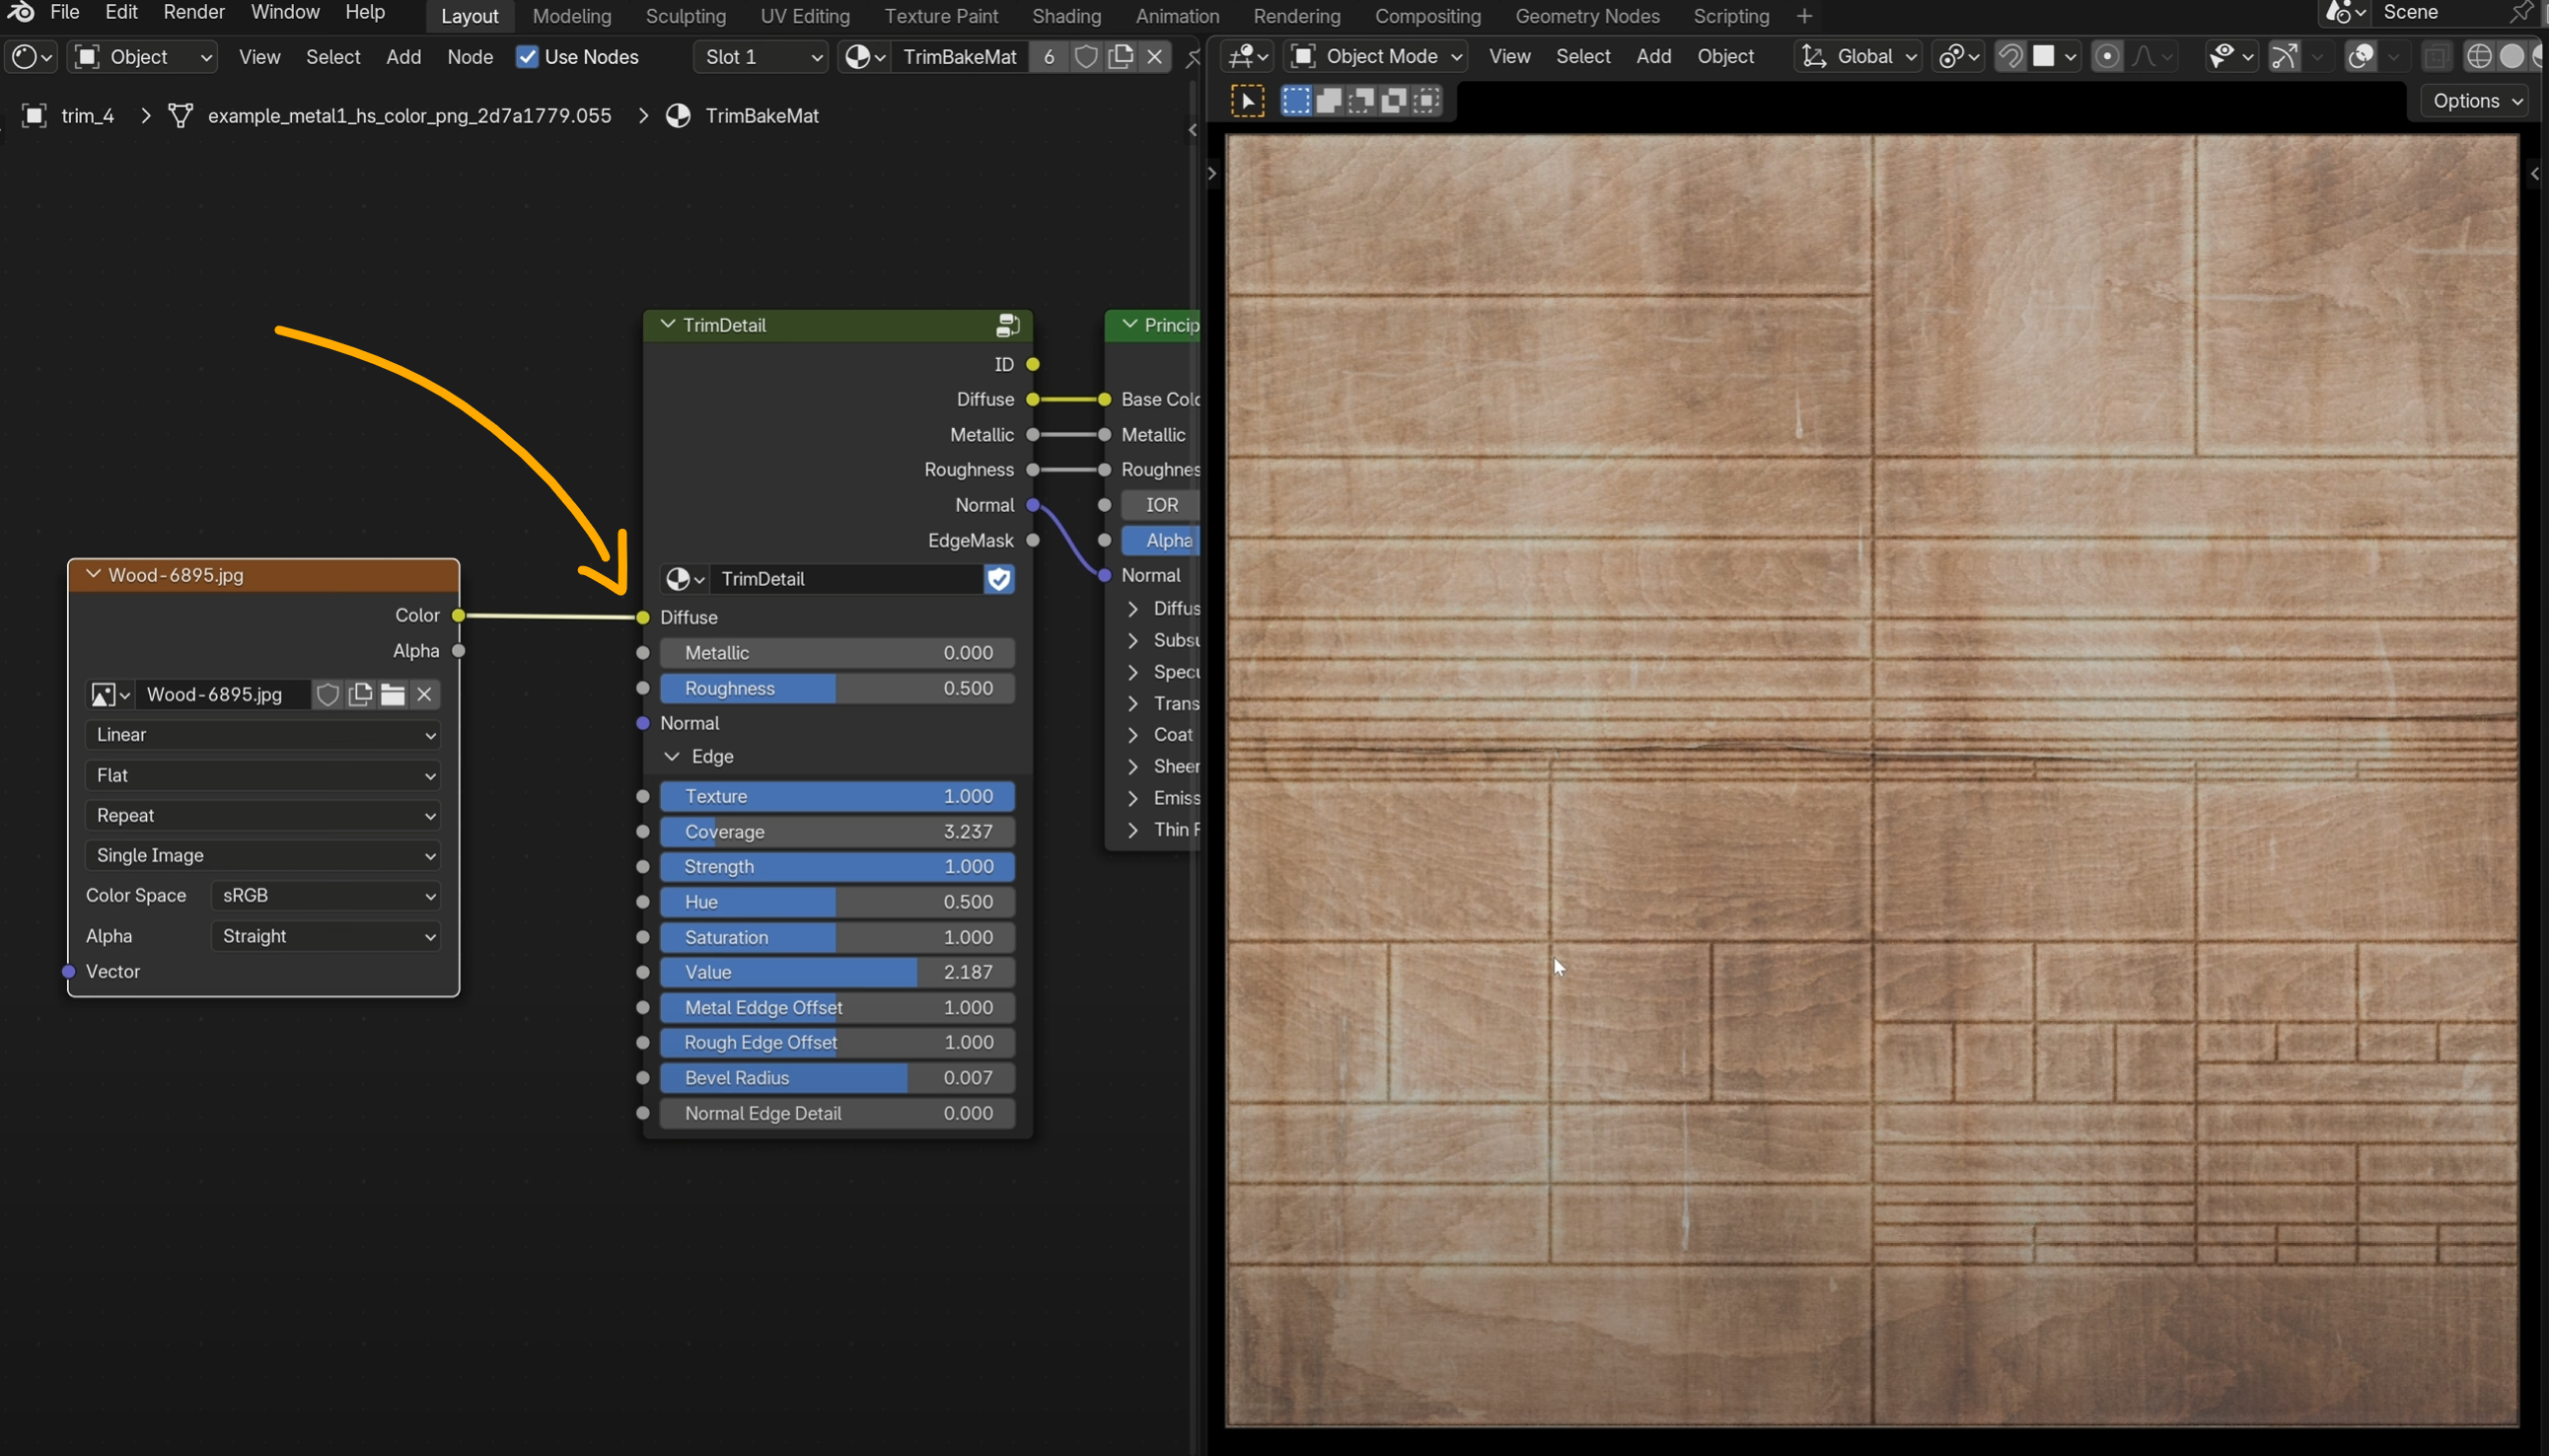
Once you open the file you’ll see a standard principled BSDF shader with a new node group plugged into it called TrimDetail.
In the 3D viewport and outliner you’ll see 6 collections.
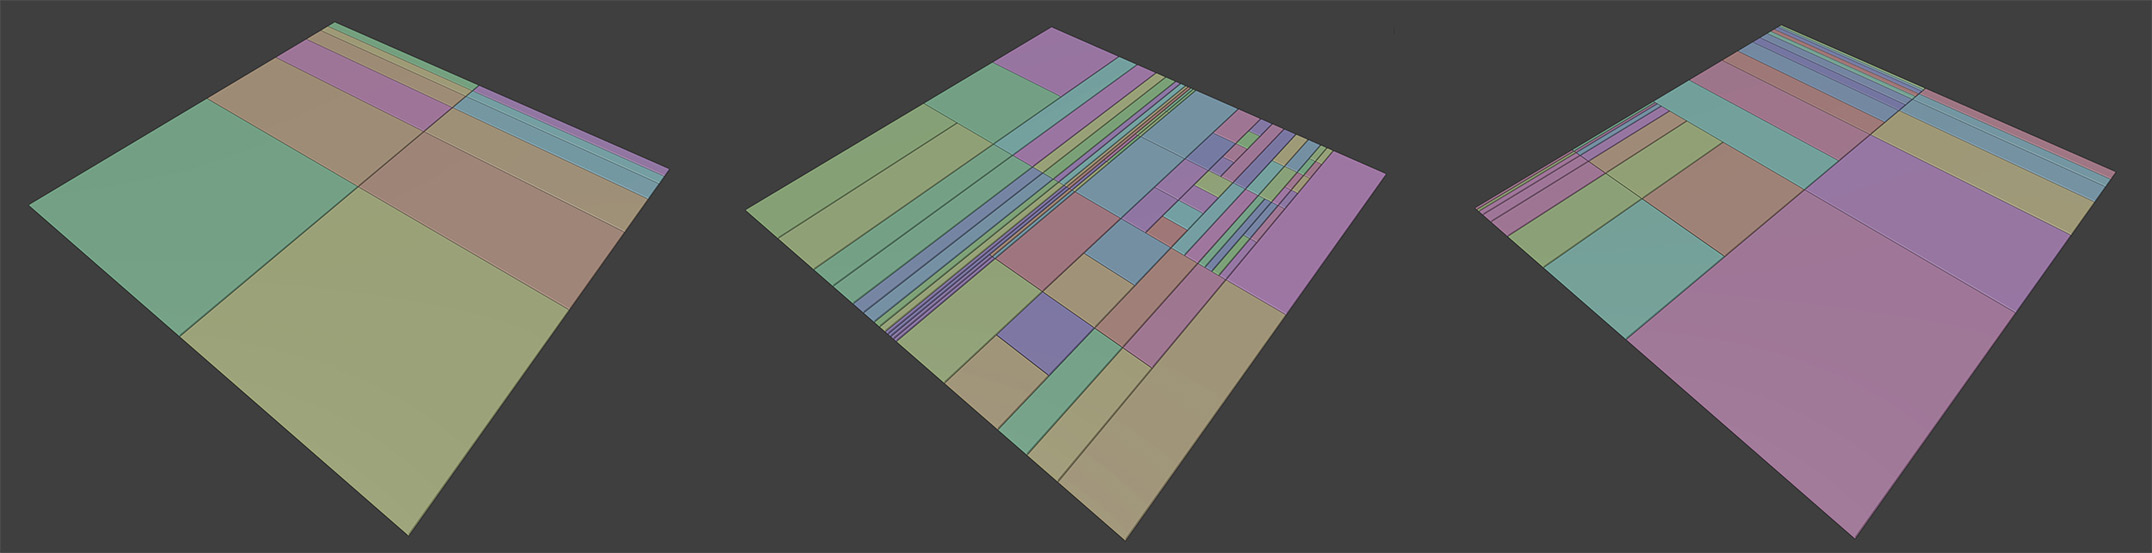
Each one has a trim-sheet template.
I scoured the internet finding the most useful patterns for hotspot trims. And these are the 6 I ended up with.
Let’s start by enabling just number 4. It has a good amount of variety.
You really only need one image to get this whole thing to work.
Let’s use this wood image. It’s free from texture.ninja. It’s not seamless, doesn’t tile. We have no PBR maps. I just want you to know how simple you can keep this in a minimal scenario.
Plug it into diffuse. We already have some edge breakup but we can make it better.
Let’s use the same image for roughness.
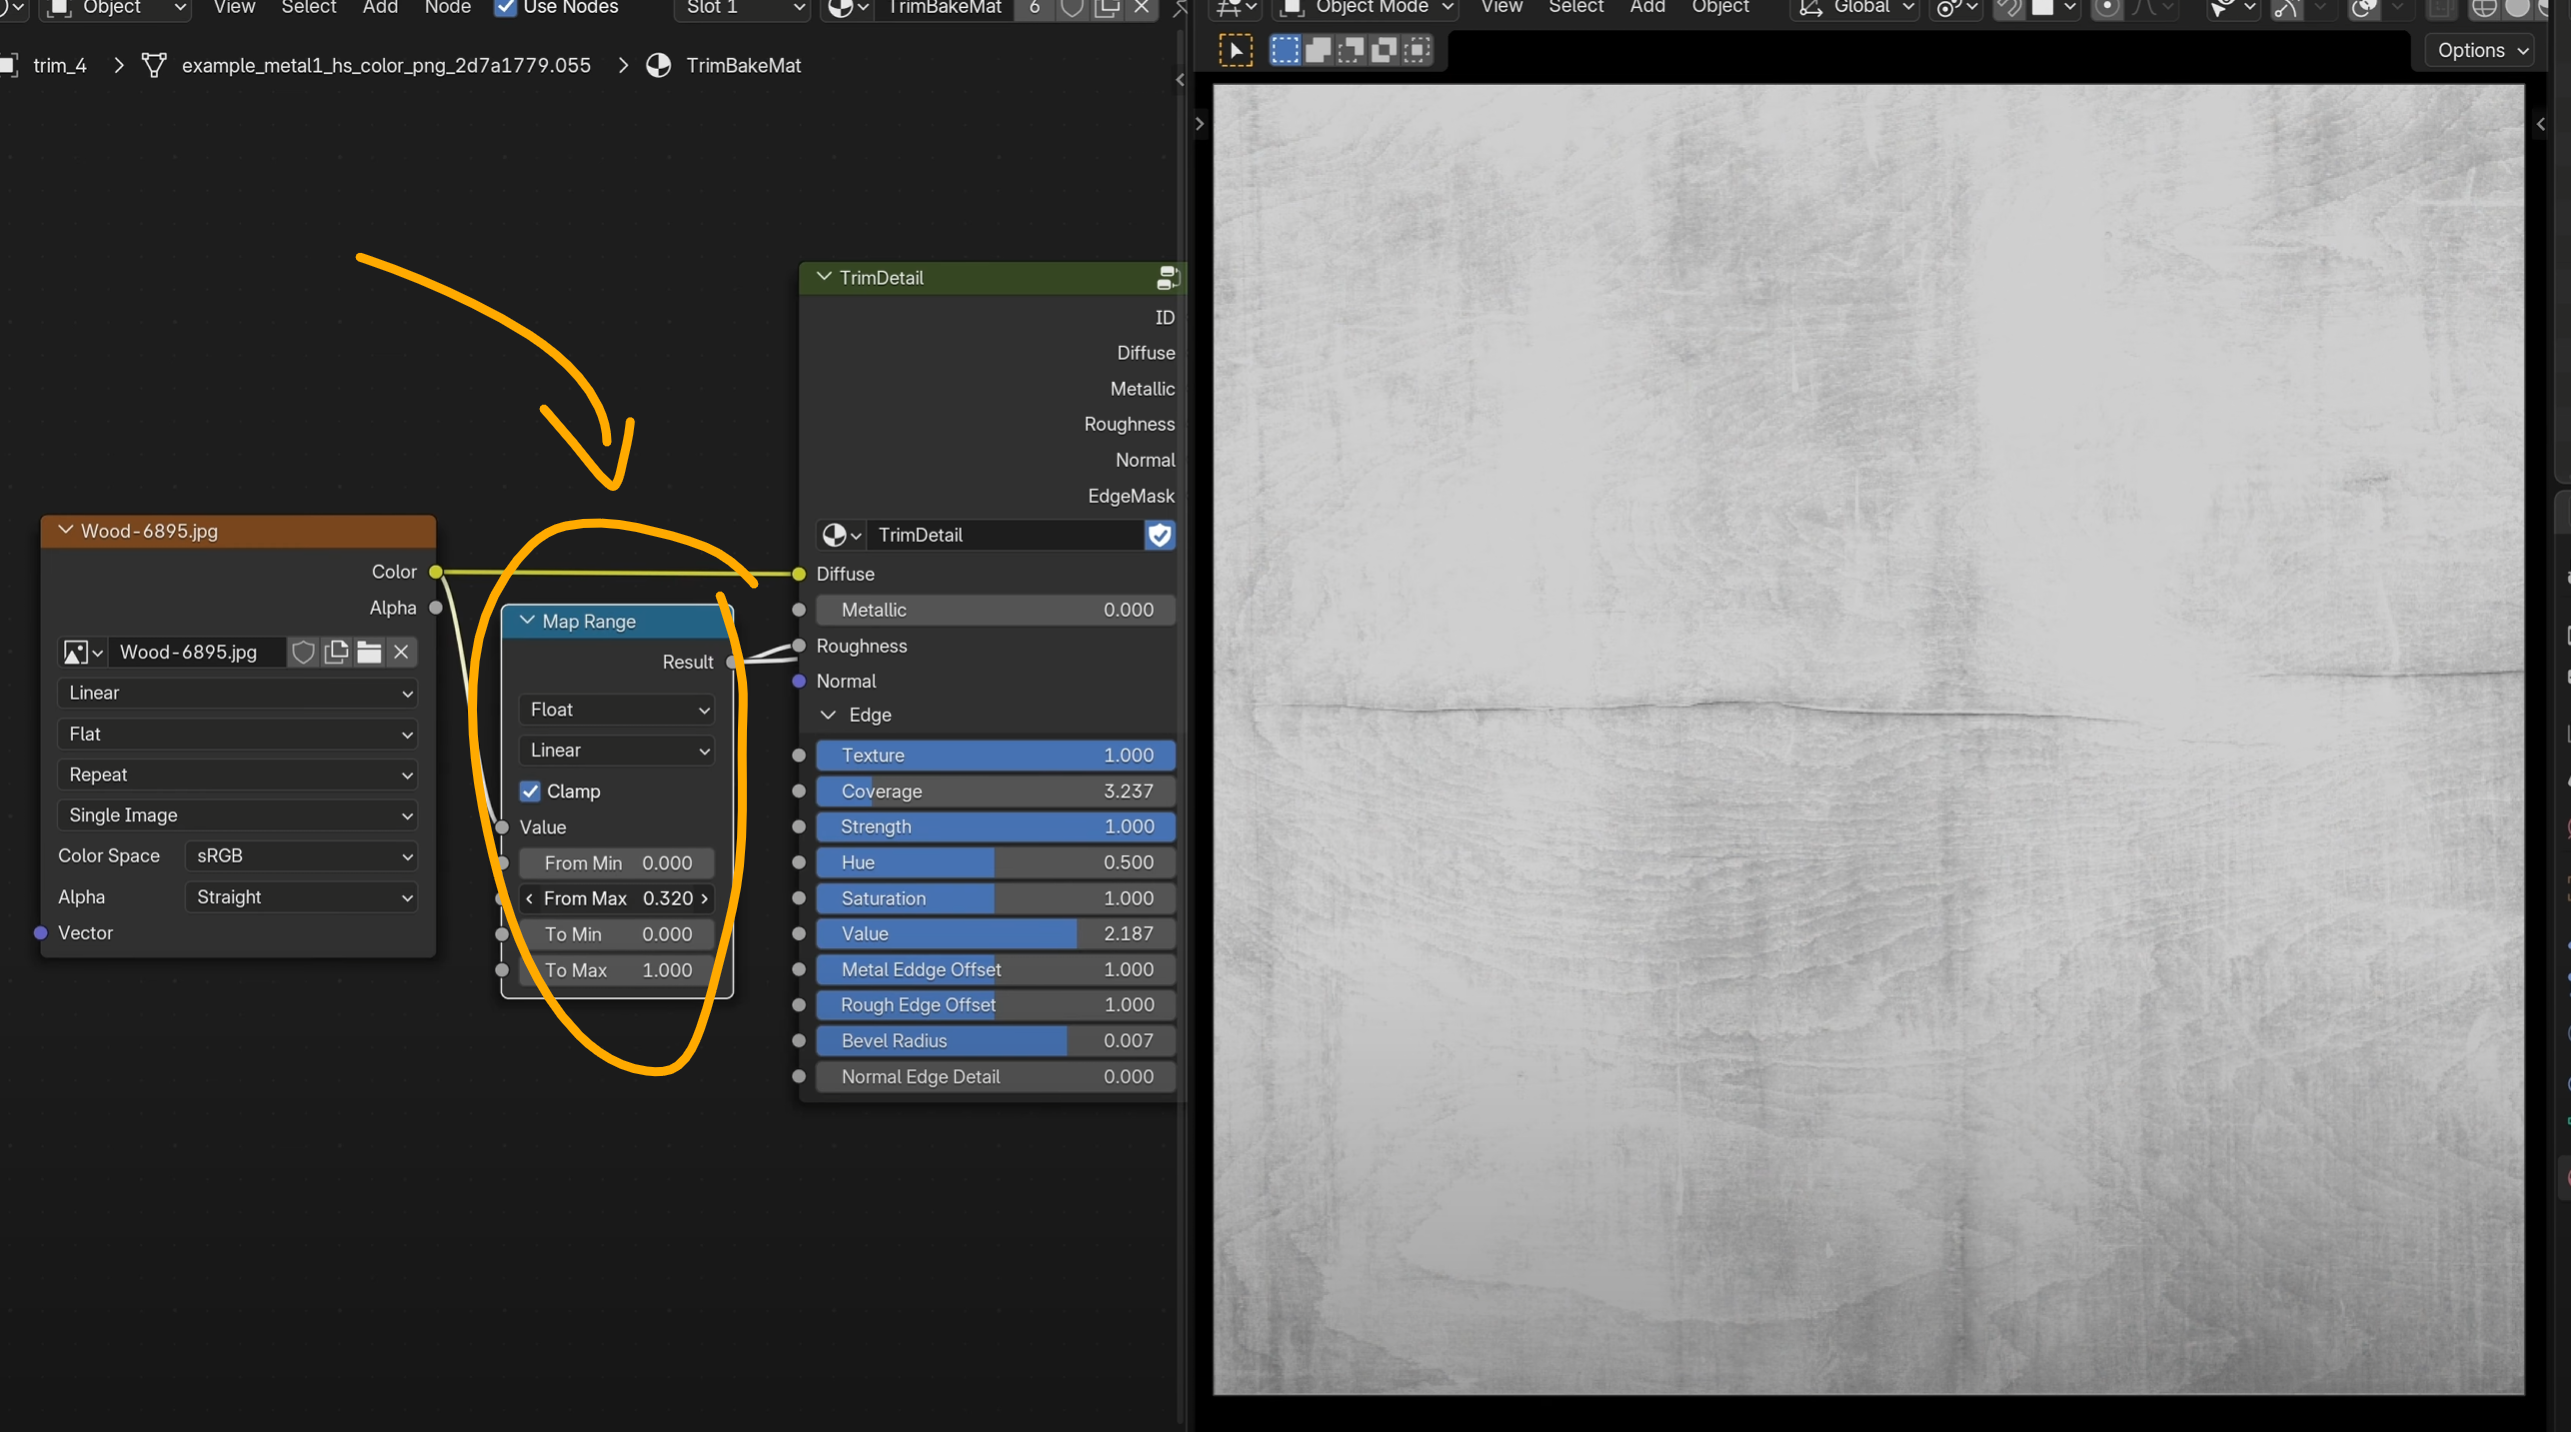
That’s a little glossy so we could use a curve node to play with the values.
That’s a little glossy, so we could use a map range node to play with the values.
We could even use it for a normal map, if we use a bump node and plug it into height.
Let’s use the same image again, and plug it into texture under edge. That just breaks up the edge detail!
We have a coverage slider, strength, and can choose the hue saturation and value for the edge. Let’s just make our edges a bit brighter and maybe less saturated.
We also have a roughness edge offset, to make edges more rough, or more glossy.
By default there’s automatic edge beveling going on, and you can increase or decrease that radius. That just softens the hard edge.
There’s also this normal edge detail slider, which uses your input edge texture to generate extra bumpiness along the edges.
Now, to bake all of the maps just press f12 to render. It’ll create
diffuse
roughness
normal
metallic
edge
and even an ID map.
It already saved all the files in a new folder called “output” wherever this .blend file was saved. You can rename the folder to avoid it being saved over.
Now, hotspot mapping. I wrote an article on rileyb3d.com this week comparing some hotspot mapping pluggins in Blender. I’ll link that in the description if you want to take a deeper dive.
We’ll just use the free DreamUV plugin. The interface is like 5 buttons total. It’s really simple.
Just choose your object. For me. I’ll use this cube thing that’s in the sample object collection. Add a new material and plug in the maps we baked.
Now we just need to hotspot map this thing. open up dreamUV after installing. It’s in the n panel.
Our texture is 4096.
For the trim template, select trim template 4, because remember we baked using our 4th template collection up here.
for material, select the one you just plugged your maps into.
Then, press hotspot.
Just like that, we have edge detail wherever we had a seam. Not only that, but we even have nice beveled normal information. Without even having a highpoly object to bake from. The best part is we never left blender. Not even to make our trim sheet.
To switch it up, press the button again. And again. Play around with different image inputs. I usually get by with a single image, then just use map range or RGB curves to change the images to work for the other inputs like metal or roughness.
Try different images for the edge texture, play with the values. Just have fun.
The caveat is this technique works best on geometry that has 90 degree or near 90 degree angles. Which, ends up being like most the stuff people build, so there’s that going for you. Shelves, doors, windows, desks, chairs, pillars, walls, boxes, ugh… plaques, labels, fences… you get the idea.
Now you not only have this technique in your toolbelt, but you can bake your own custom hot spot trim sheets. All within Blender.
Pick up the .blend file over on my Patreon. Link in the description.
Thanks for watching. Subscribe.
Oh, and special thanks to R3mer. He’s a friend of mine, check out his channel in the description to watch his prop and environment process videos in Blender. Pretty cool. He was a big part of helping me get my trimsheet workflow sorted, and was just a ton of help on discord. So thanks. Also, special thanks to these Patreon supporters. I appreciate you keeping this content free for everyone.
Introducing HotBox v1.0
You don’t need Substance Painter. You don’t need a highpoly sculpt. You don’t even need seamless textures.
You just need HotBox!
HotBox is a single .blend file with one node group. It lets you bake hotspot trim sheets directly inside Blender. No add-ons or external apps.
Open the file. Pick a trim template. There are six included. I spent some time hunting down the most useful trim layouts.
You only need one image, or a group of PBR images if you want to take it that far. In the demo video I used a free wood texture from texture.ninja. It’s not seamless. It doesn’t tile. It has no PBR maps. I want to show you how little you can get away with.
Plug it into Base Color.
Now plug it into Roughness. If it’s too glossy, use a Map Range or RGB Curves node to tweak values.
Want normals? Pipe the same image through a Bump node.
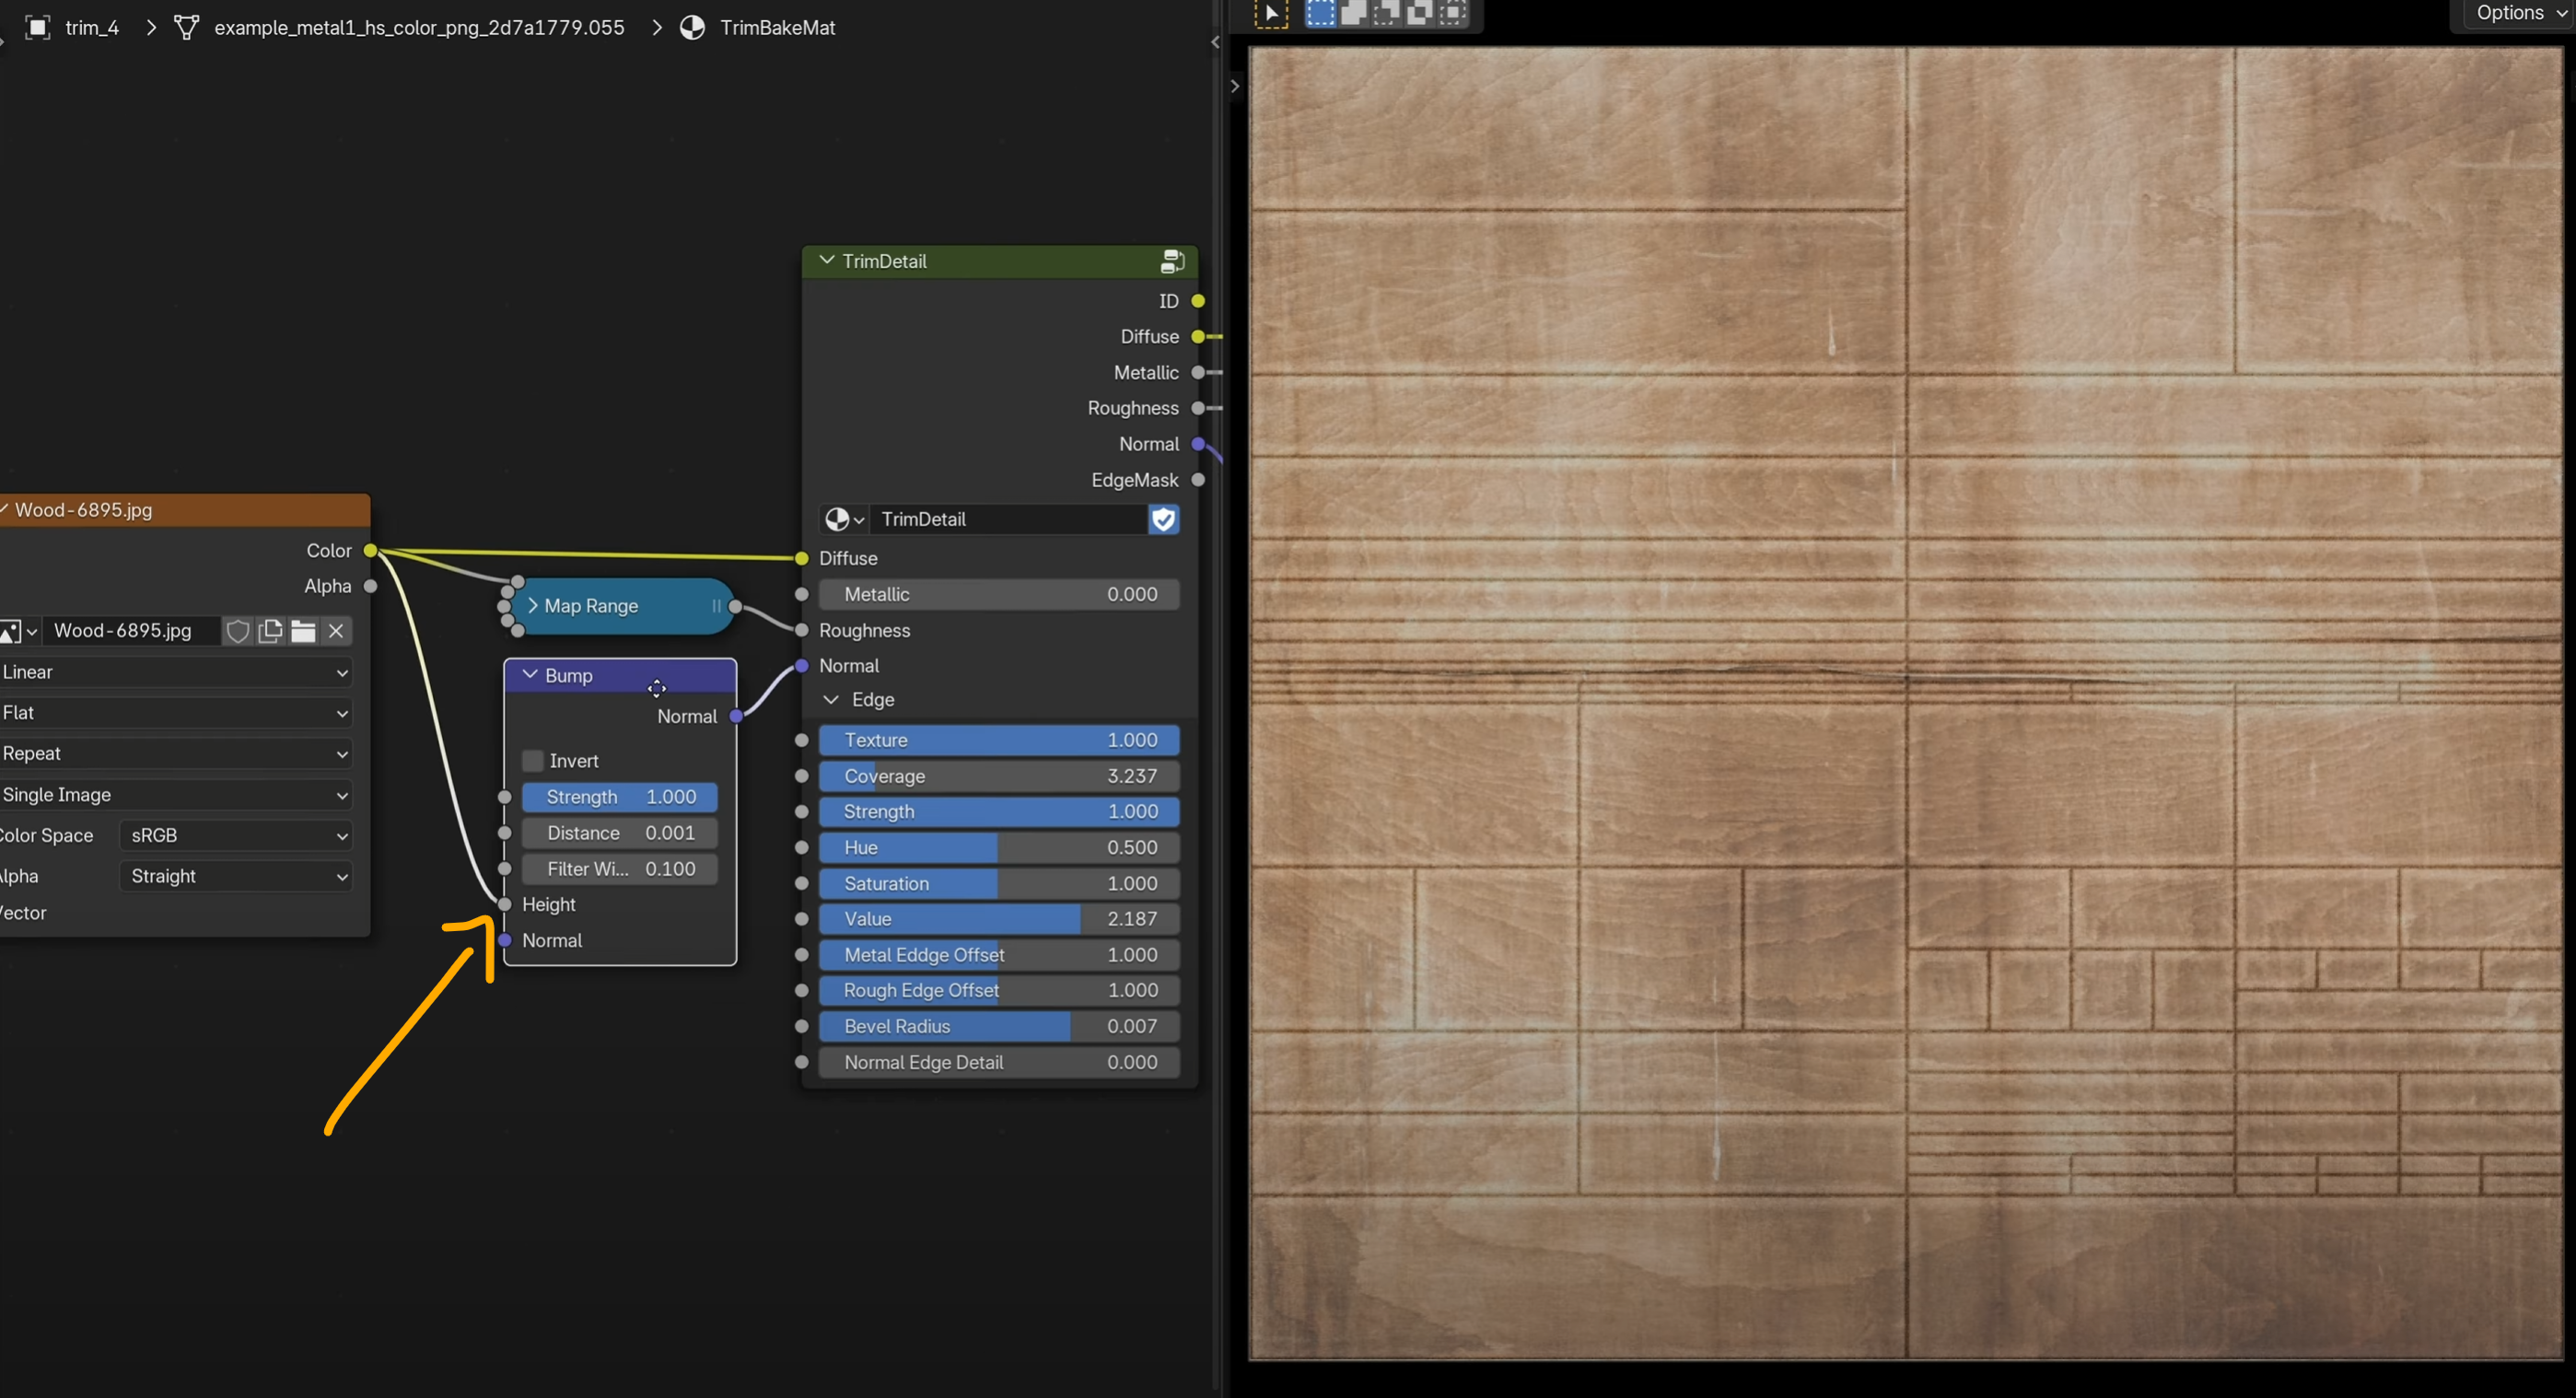
Want edge detail? Use the image again in the Edge Texture input. Now play. Adjust edge strength, coverage, hue, saturation, and value. Brighten or dull the edges. Sharpen or soften them.
Slide the roughness offset to push the edges toward glossy or matte.
There’s automatic edge beveling. A radius slider controls the softness. You also get a normal edge detail slider that adds bump using your edge texture.
When you're happy, hit F12 to render and bake the maps:
- Diffuse
- Roughness
- Normal
- Metallic
- Edge
- ID Map
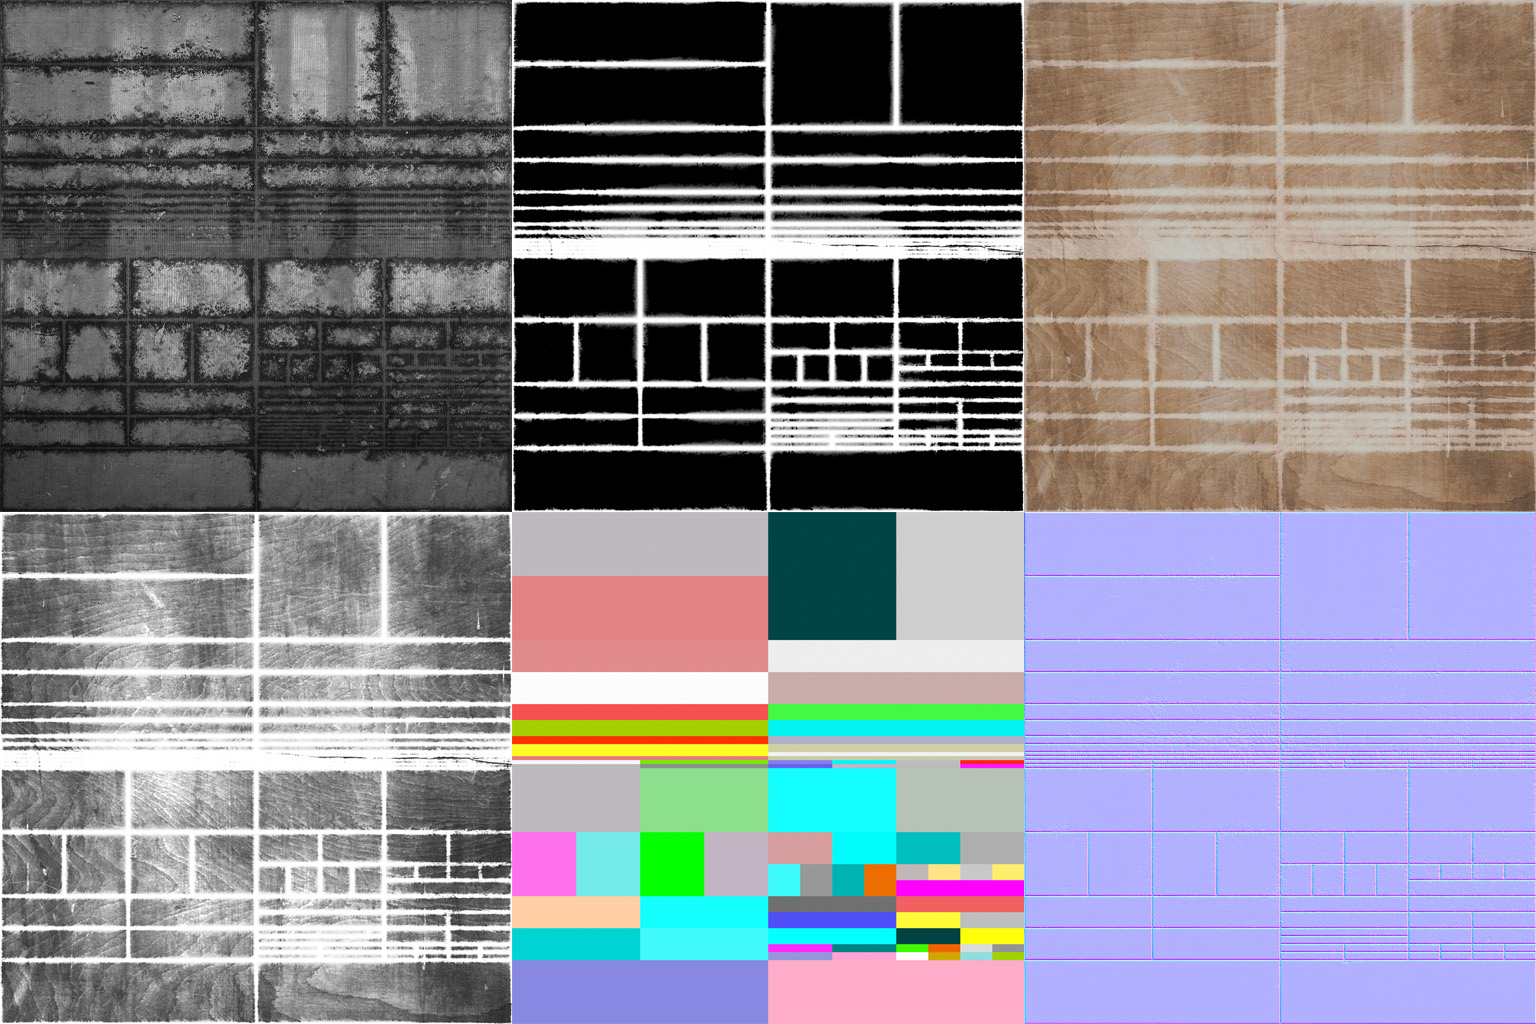
They save into an output folder next to wherever your .blend file is saved.
Now Use It
I recommend the free DreamUV plugin, or ZenUV. I reviewed them both in a recent post.
Add a new material to your mesh. Plug in the maps you baked.
Open DreamUV from the N-panel. Set texture size to 4096. Pick the same trim template you baked. Select your material.
Click Hotspot.
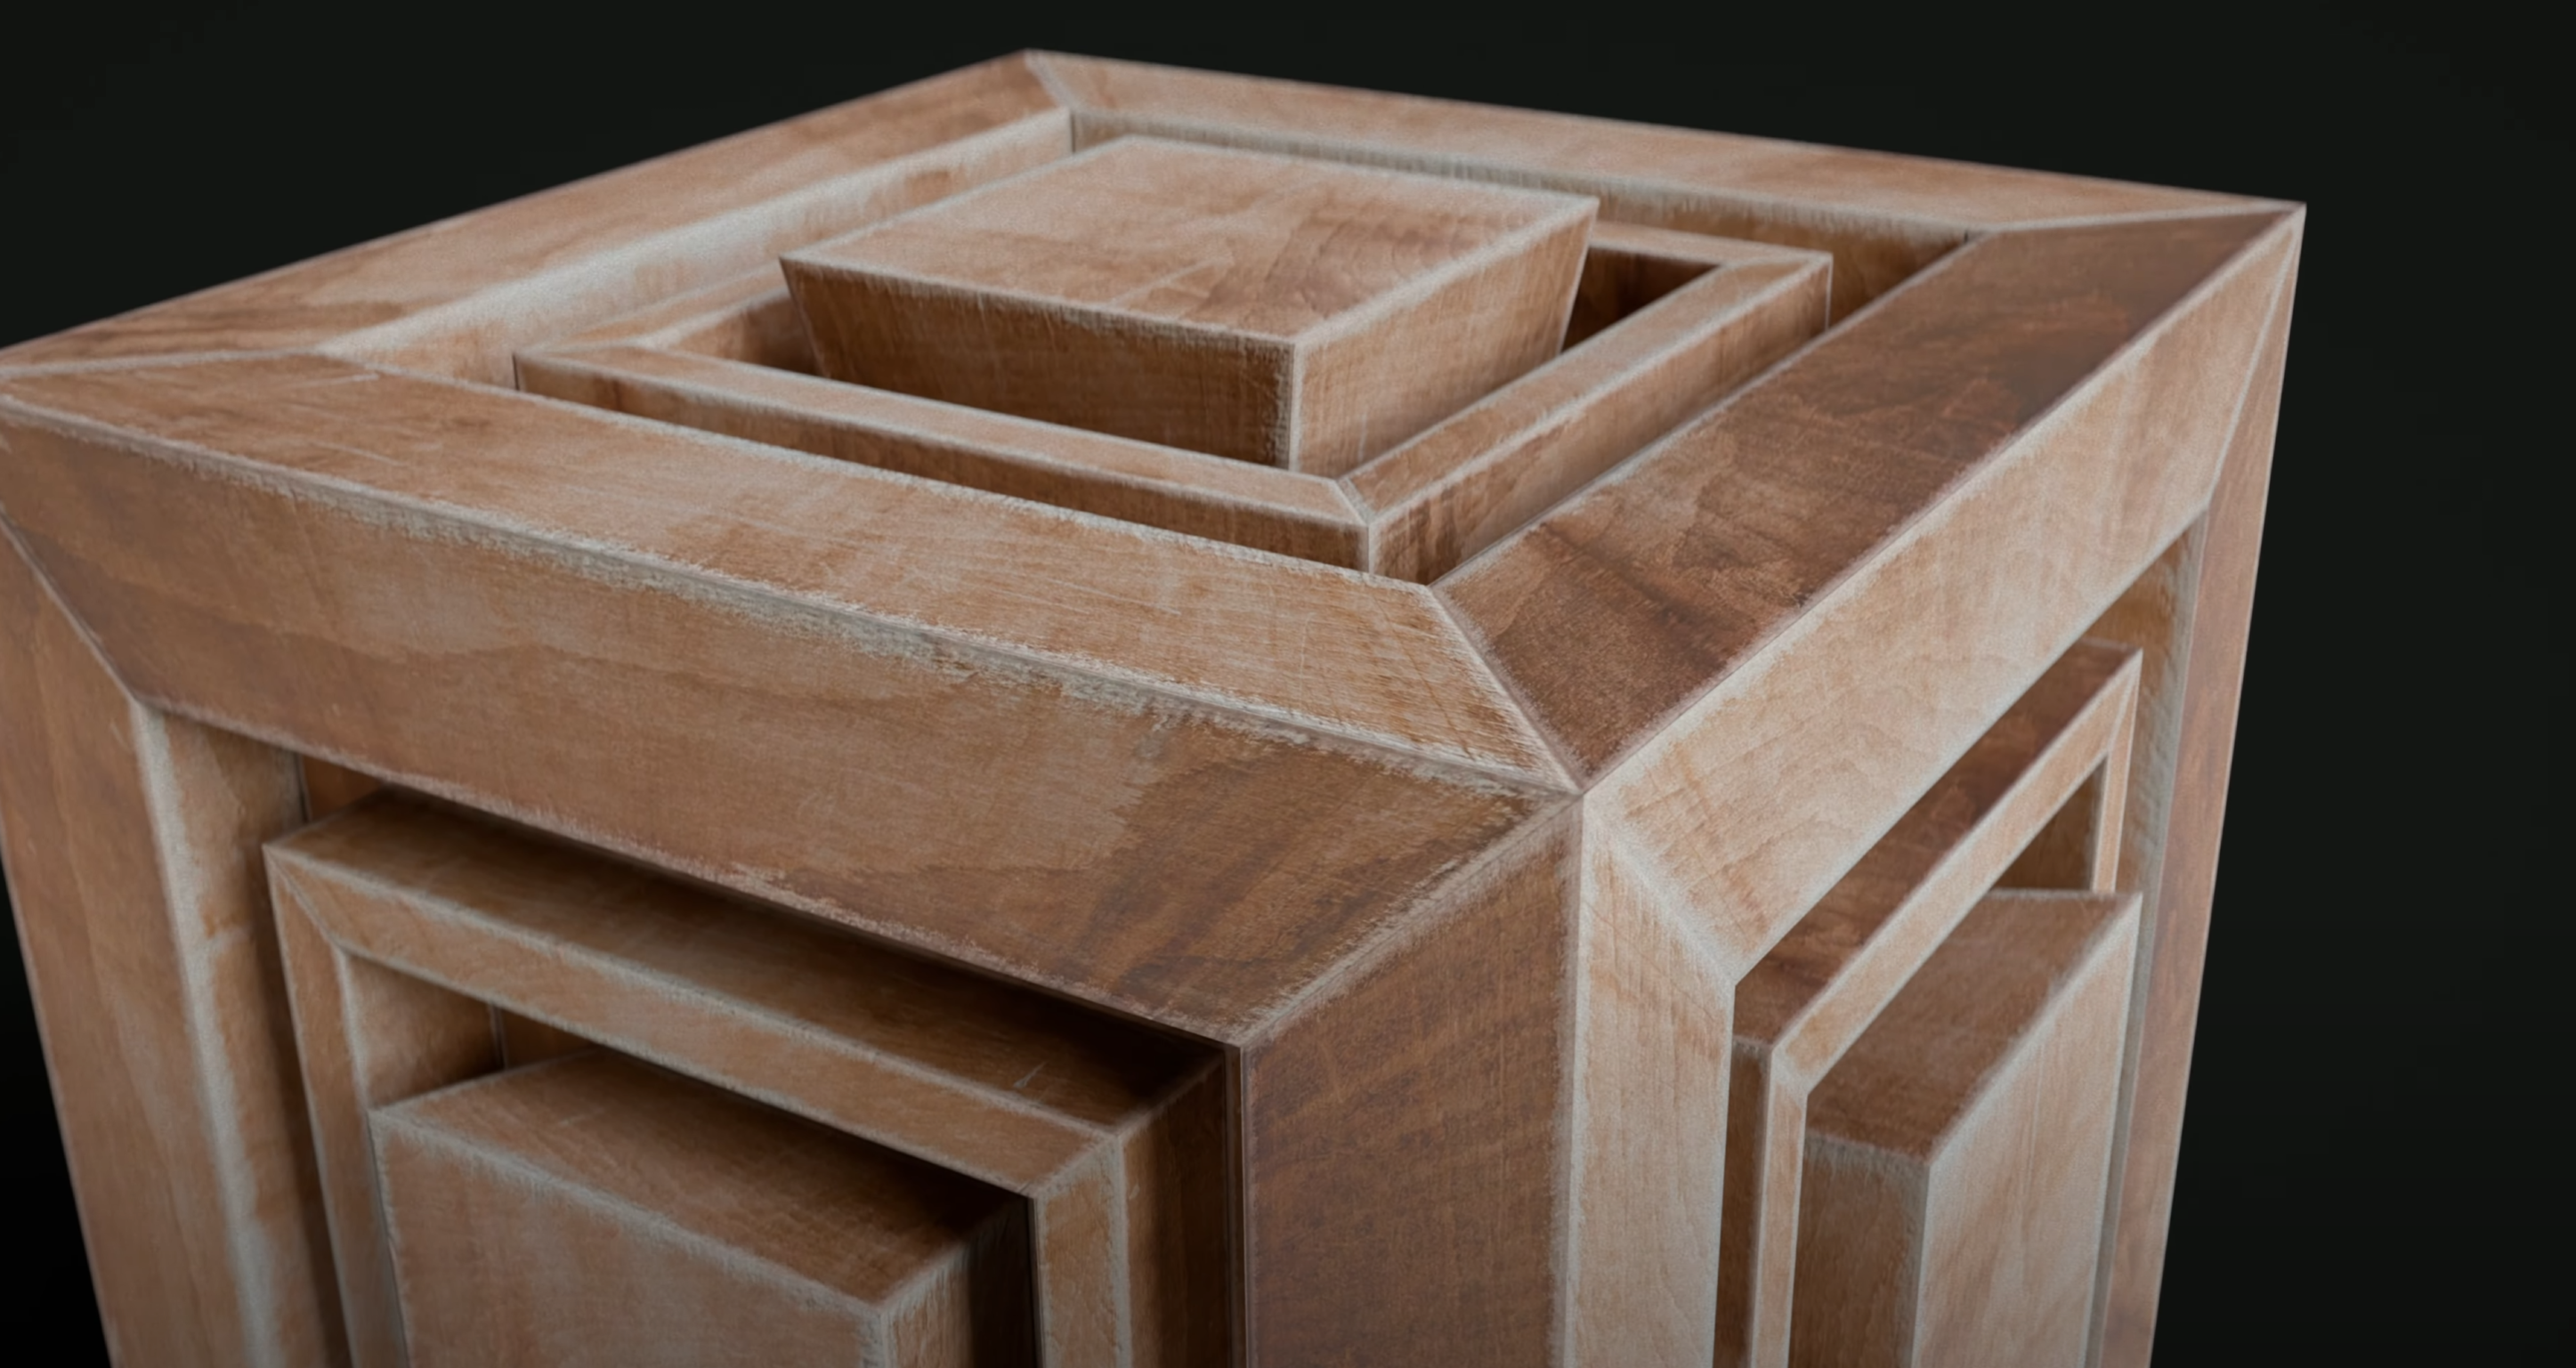
Just like that, the mesh is mapped. Edge detail appears at seams. Beveled normals show up. No highpoly needed. And you’re still in Blender.
Of course, you don't have to stick with this wood texture. Try different input images. Swap edge textures. Tweak sliders. Iterate, and have fun with it.
This works best on geometry with 90 degree angles. Think shelves, doors, desks, walls, windows, fences, boxes, labels. The good news is a LOT of manmade props fit that bill.
Bake your own hotspot trim sheets. Stay inside Blender the whole time.
Get the .blend file on my Patreon.
Thanks to my Patreon supporters for keeping this tutorial content free. You make this possible!